
GPU Server Rental Guide — Prime Intellect
How to rent a GPU server using Prime Intellect
Prime Intellect is a platform that aims to popularize AI development by implementing the entire process of securing computing resources for AI development, model training, and communal ownership of intelligence in a decentralized manner.
The main features provided by Prime Intellect are as follows:
- Decentralized AI Training: Anyone can participate in the AI development process by providing their computing resources without needing special permission, and they can receive incentives based on their contributions.
- Prime Compute Platform: A single platform where all computing resources can be rented or provided.
Among these, the Prime Compute platform facilitates participation in decentralized AI training by allowing users to rent servers equipped with various GPUs at an affordable price, eliminating the need for users to set up their own local environments.
Furthermore, the computing resources rented through the Prime Compute platform can be used not only for Prime Intellect's AI training but also for general purposes. This allows for broad application in various fields requiring computing resources, such as other decentralized AI training projects or operating blockchain network nodes.
This guide will provide detailed, step-by-step instructions on how to rent a GPU-equipped server on Prime Intellect.
1. Access the GPU Server Rental Page
1.1. Go to the official Prime Intellect website and click the "Get Started" button in the top right corner.

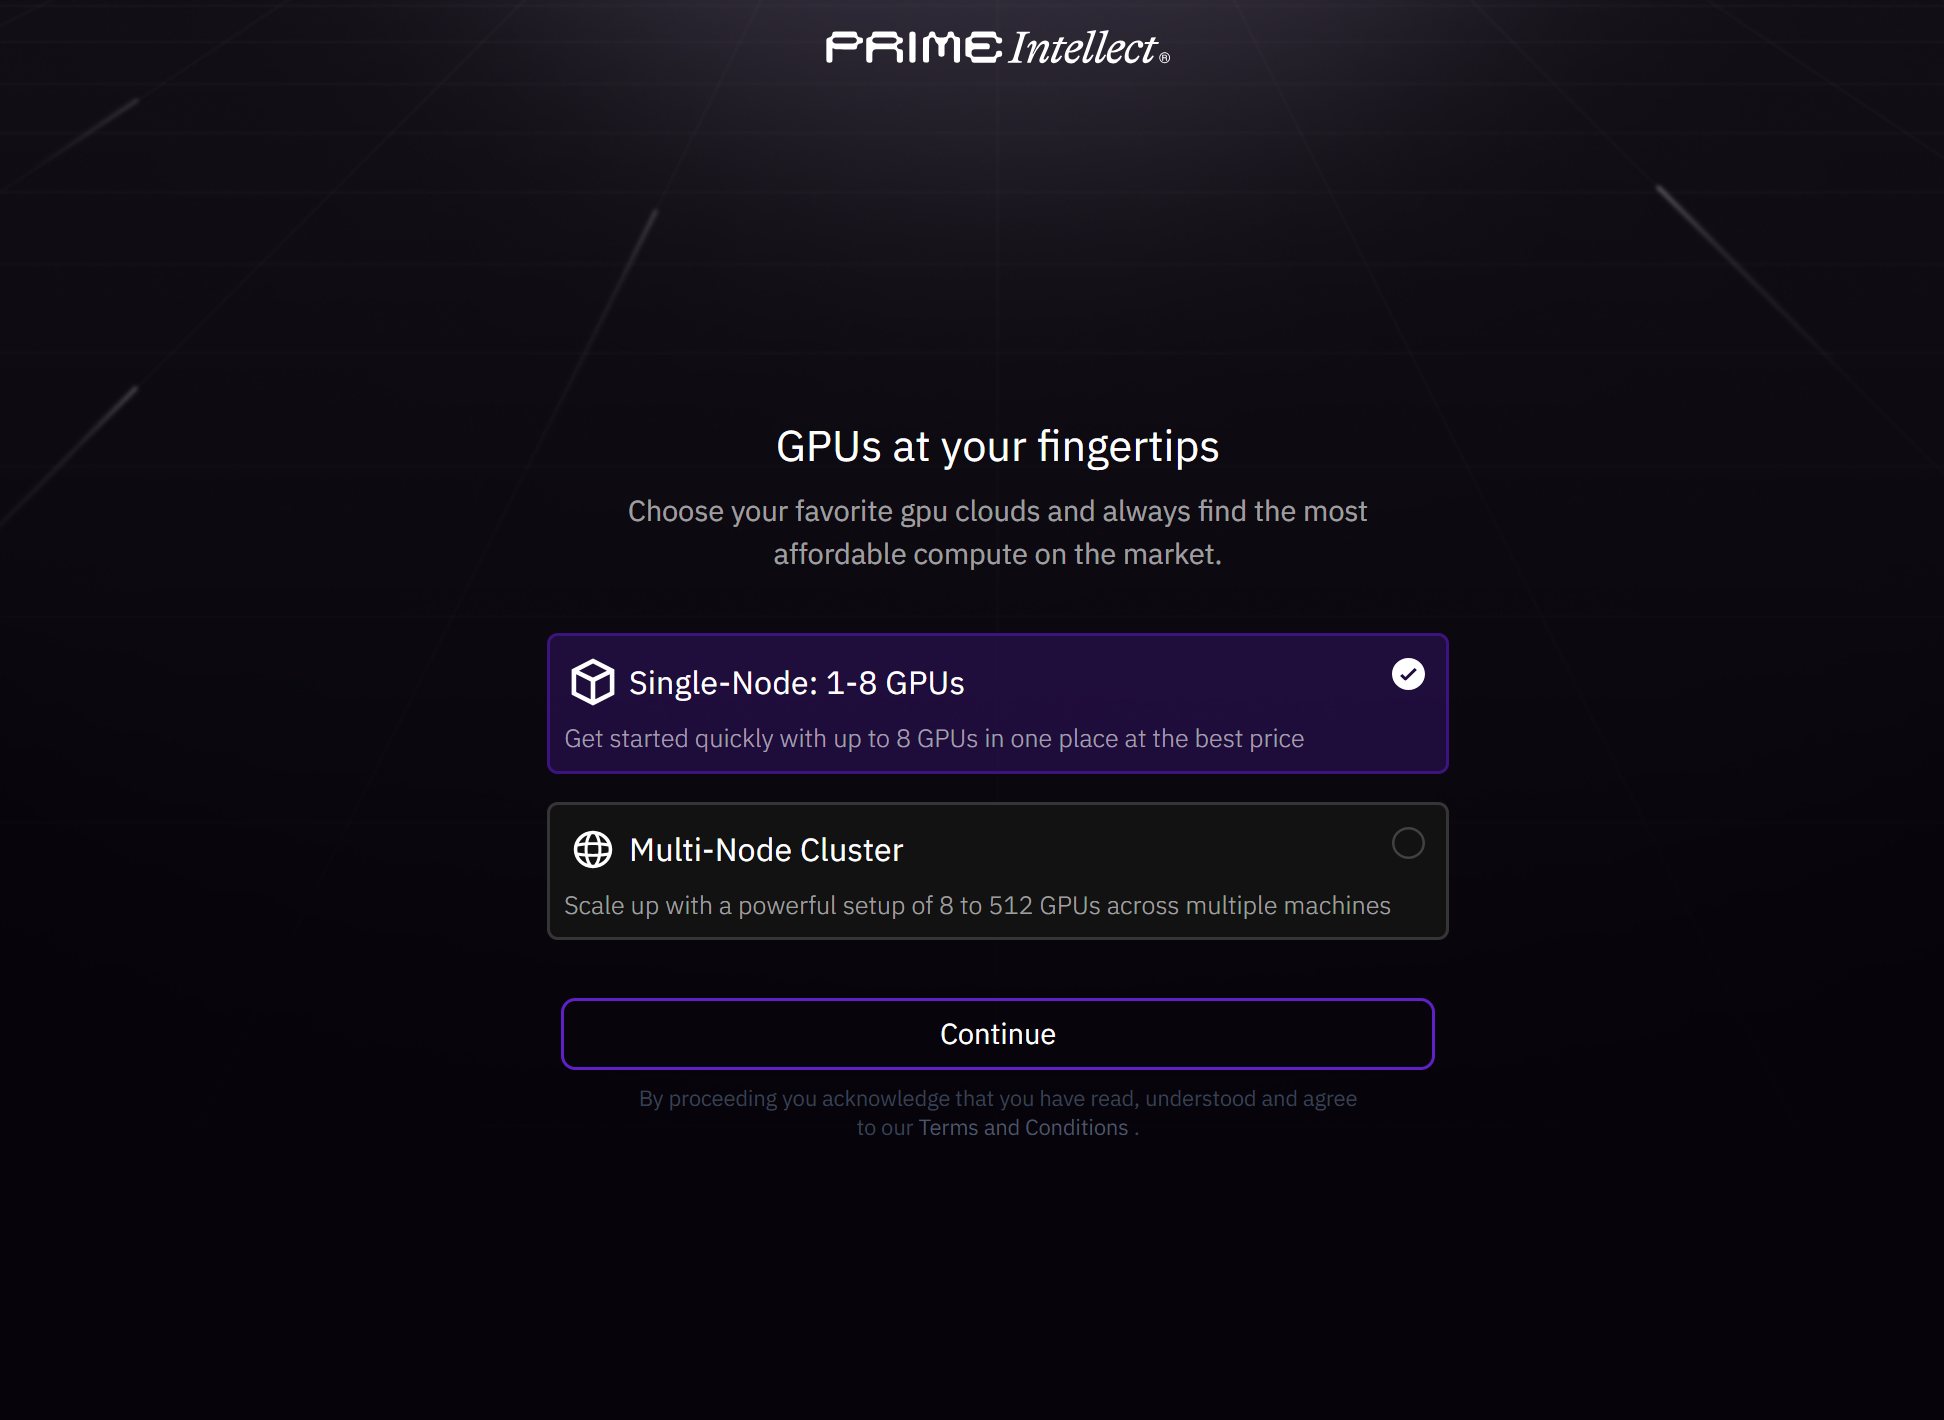
1.2. Choose the server type you need from the two options below, then click the "Continue" button.
- Single-Node: A single GPU server option.
- Multi-Node Cluster: A large-scale distributed computing environment utilizing 8 to 512 GPUs.
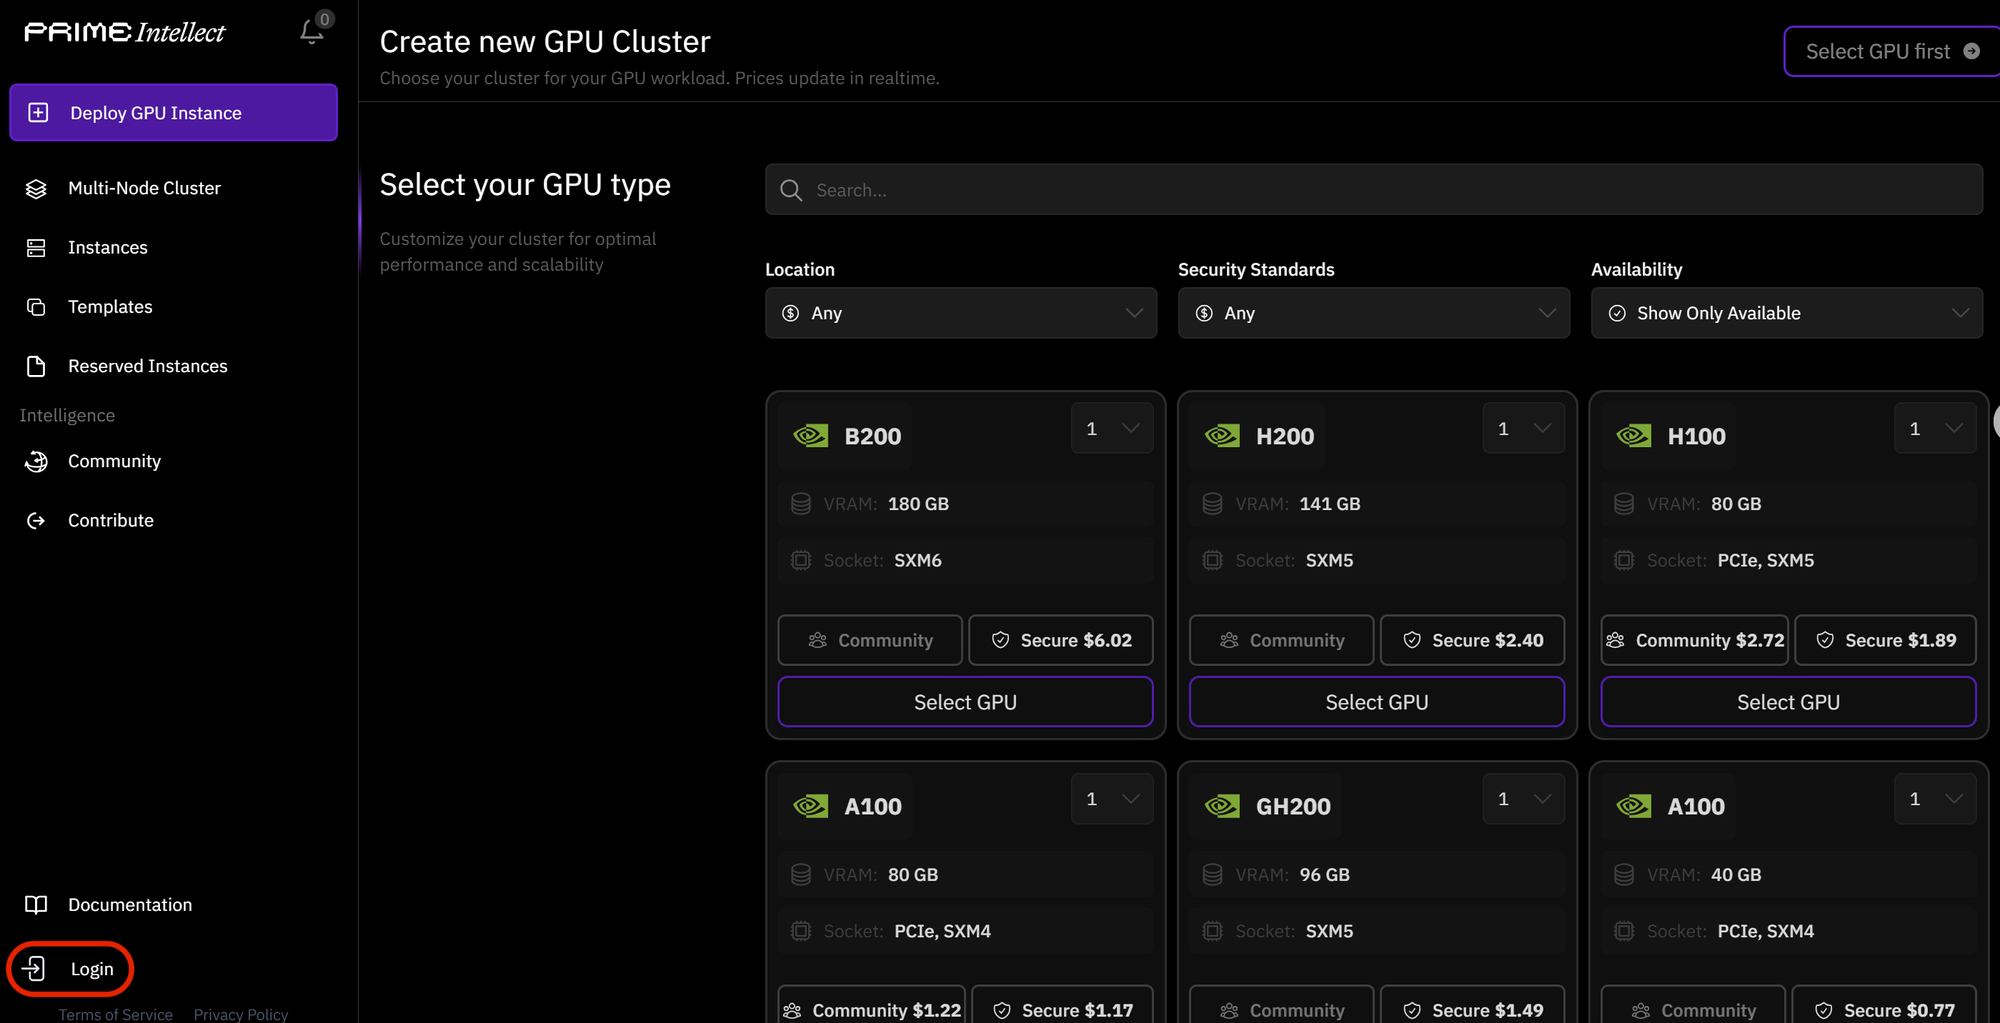
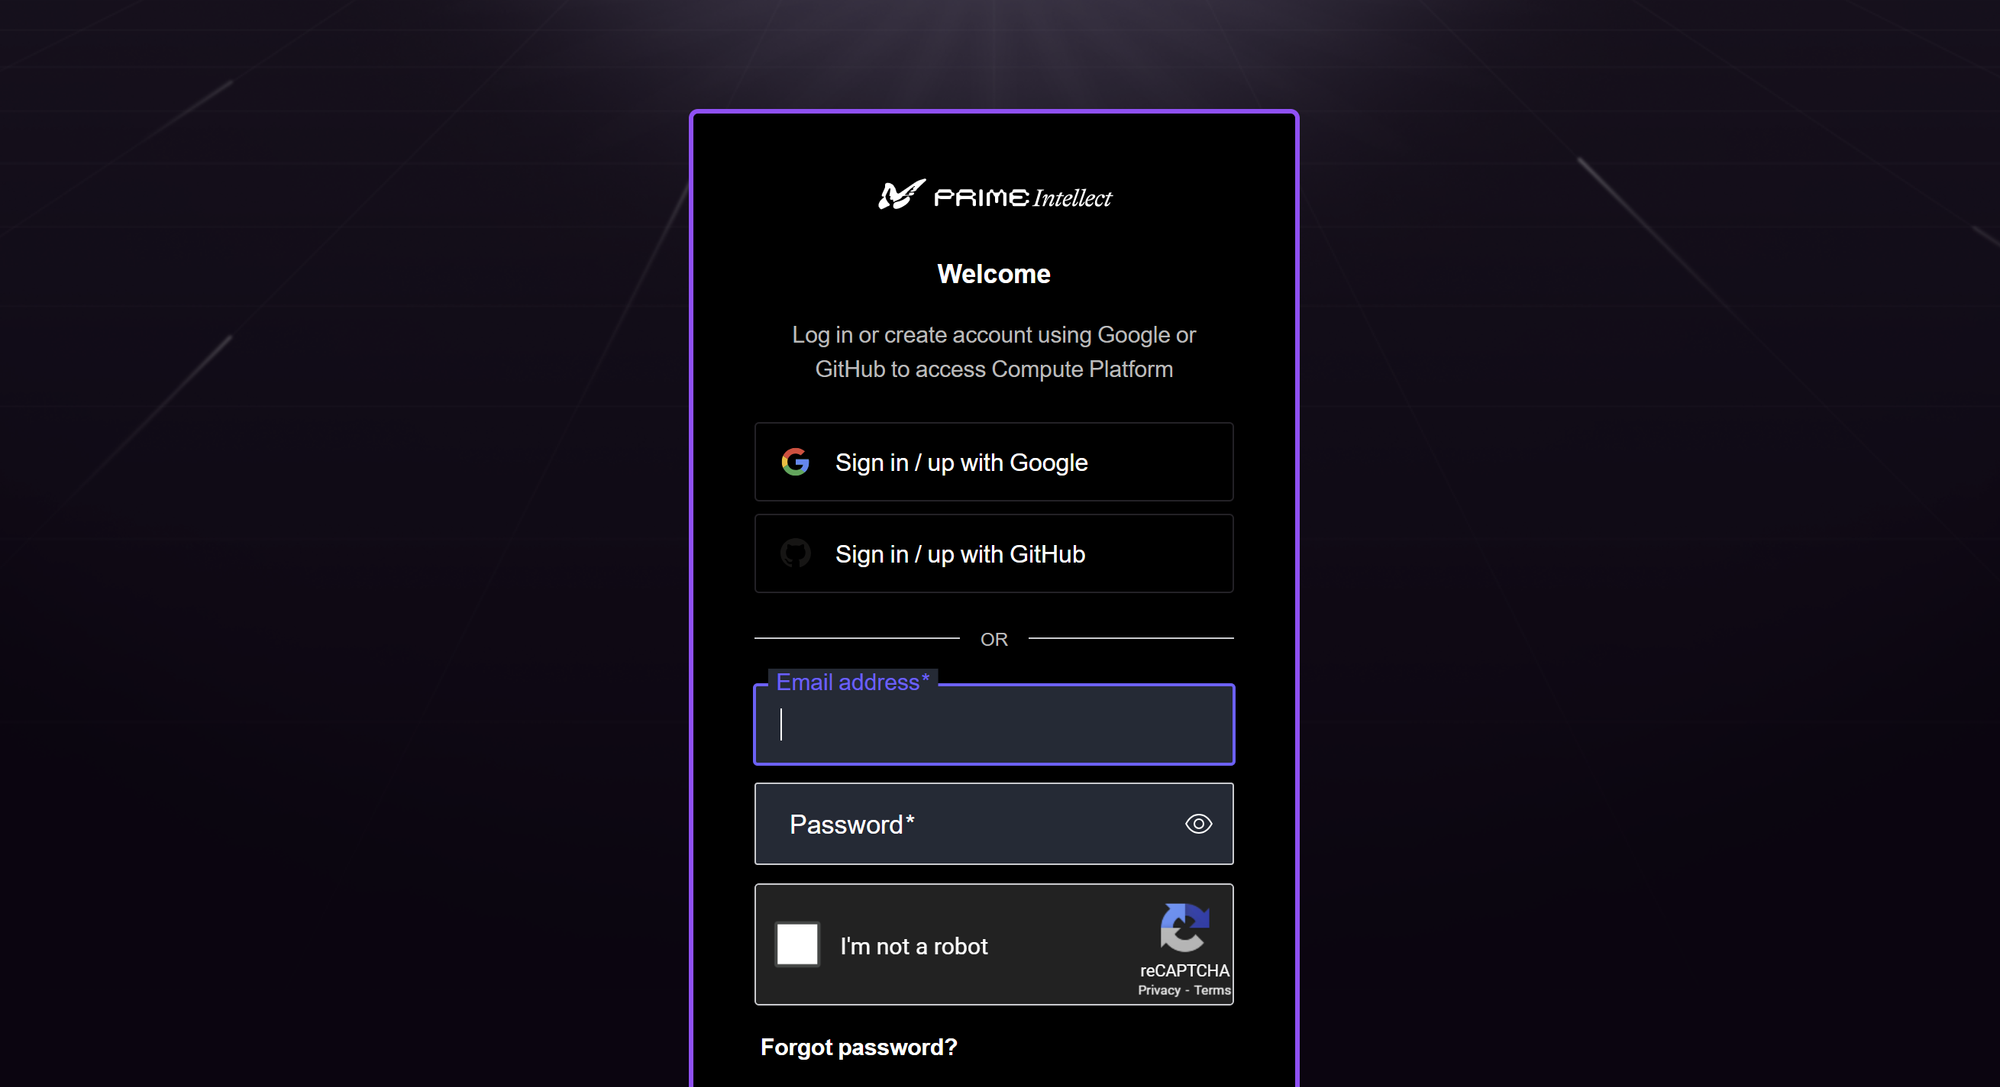
1.3. Click the "Login" button in the bottom left to sign up for or log in to Prime Intellect.
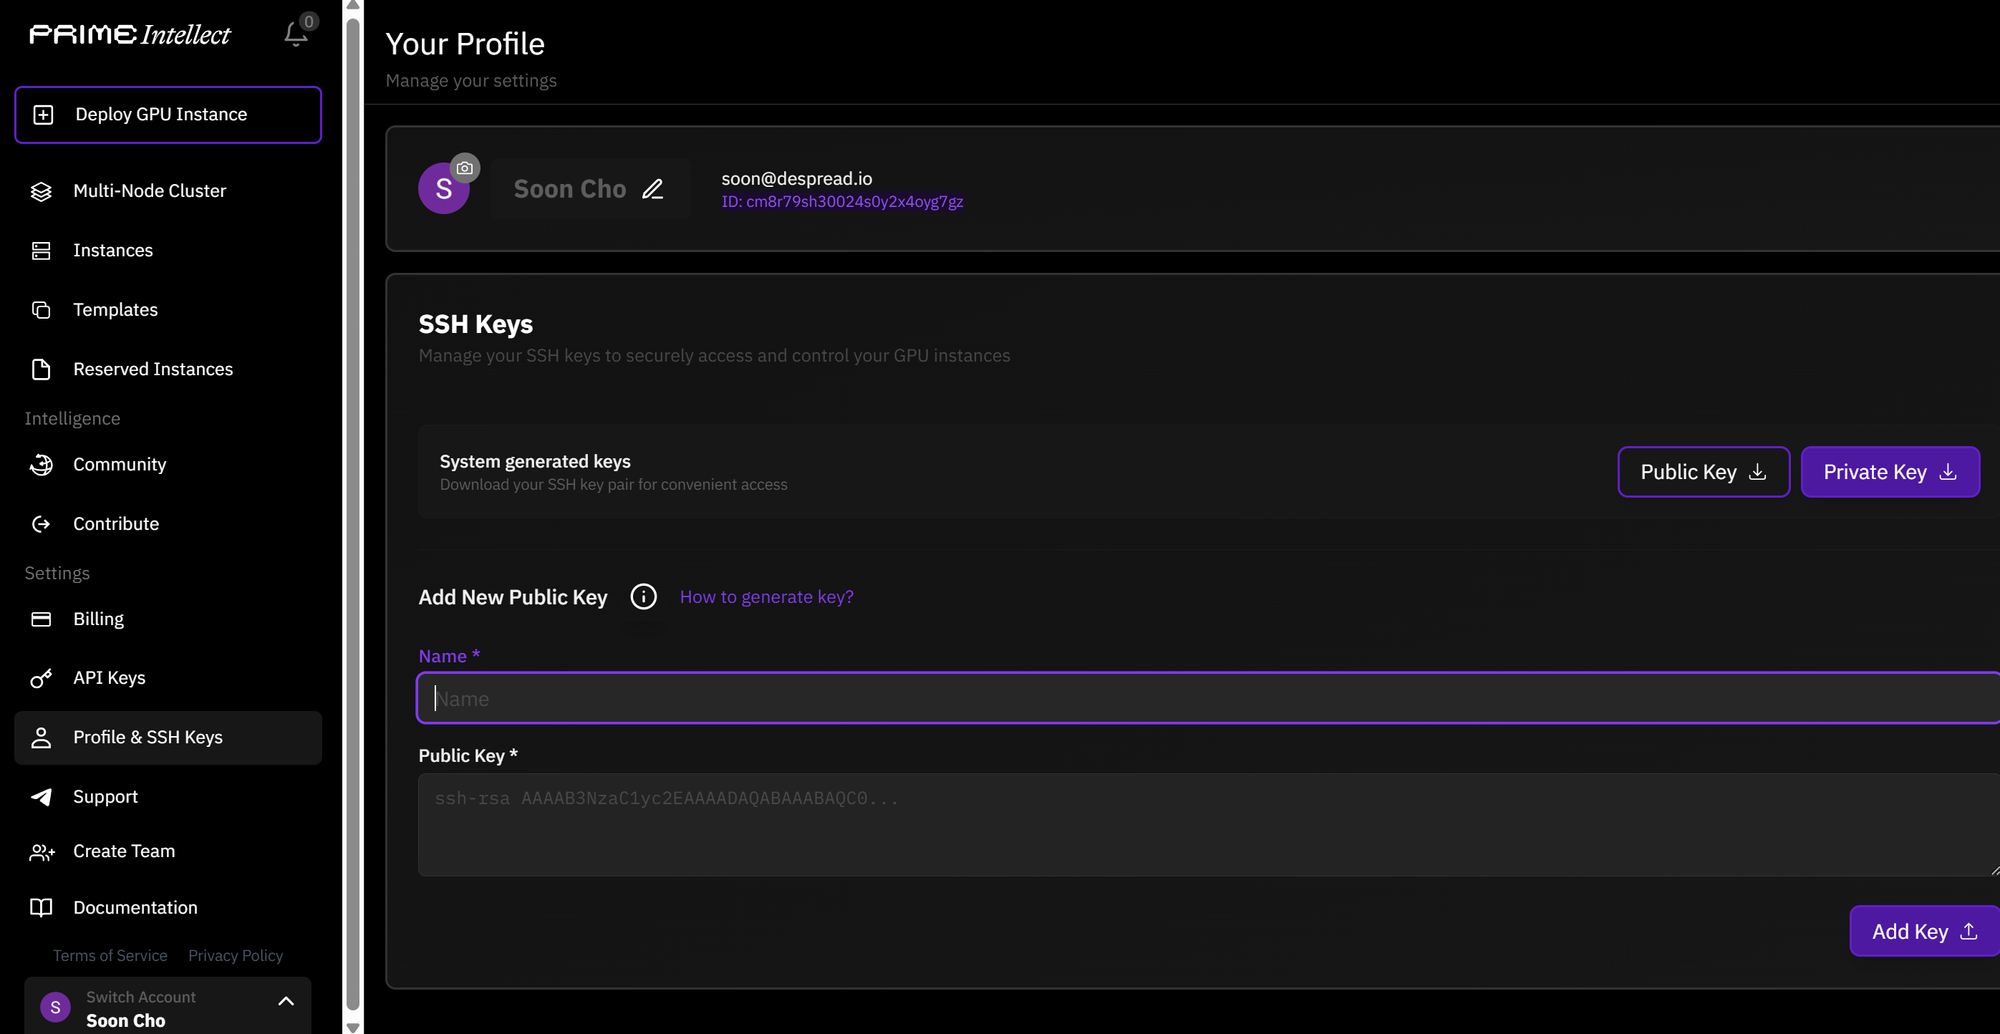
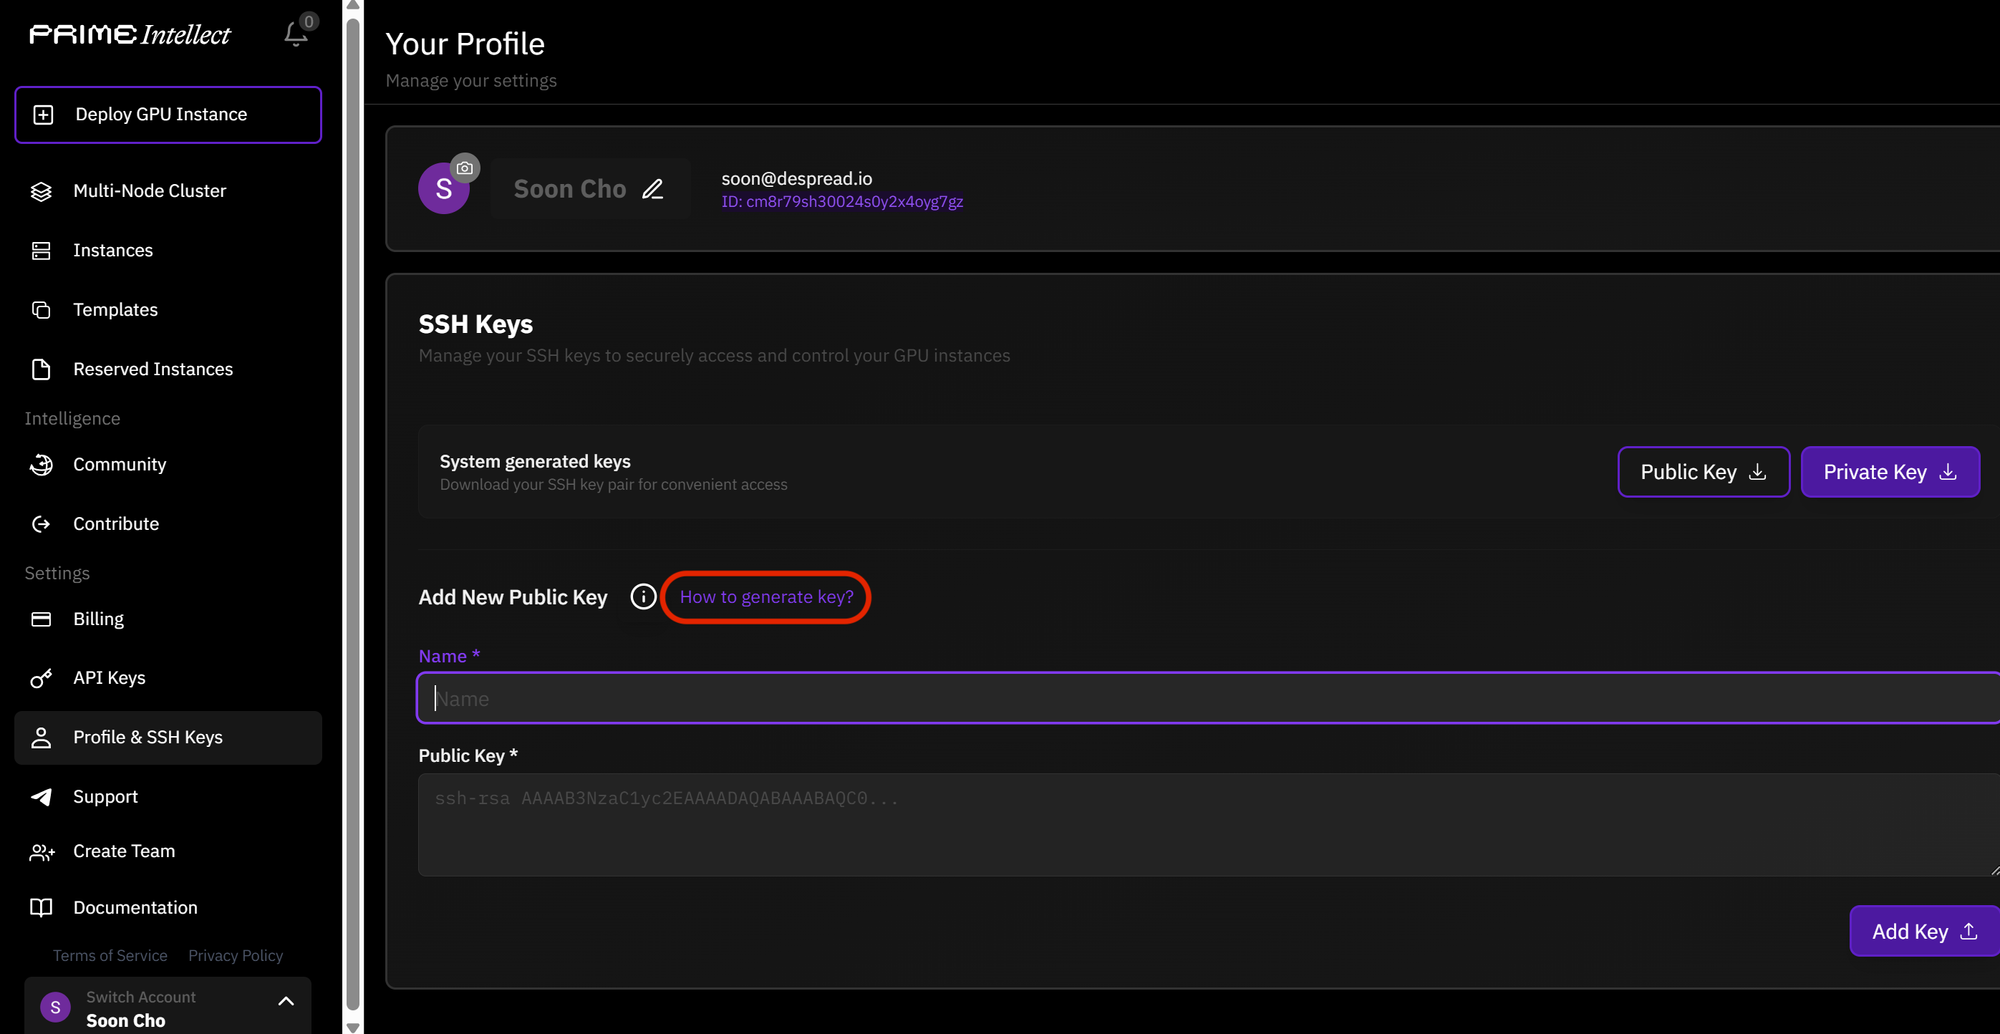
1.4. Once you've logged in, you'll access your profile settings environment, as shown in the image below.
2. Generate and Register Your Key
This step involves creating and registering your digital ID (SSH key) for secure and convenient server access. We recommend installing Git Bash before proceeding (Installation Link)
Git Bash is a tool that emulates the Unix/Linux command-line and shell environment on Windows operating systems. It allows commands like
ssh-keygen, typically used in Unix/Linux, to function smoothly on Windows.2.1. In the profile settings environment, click the "How to Generate Key?" button.
2.2. After making your selection, review the commands provided in the window that appears.
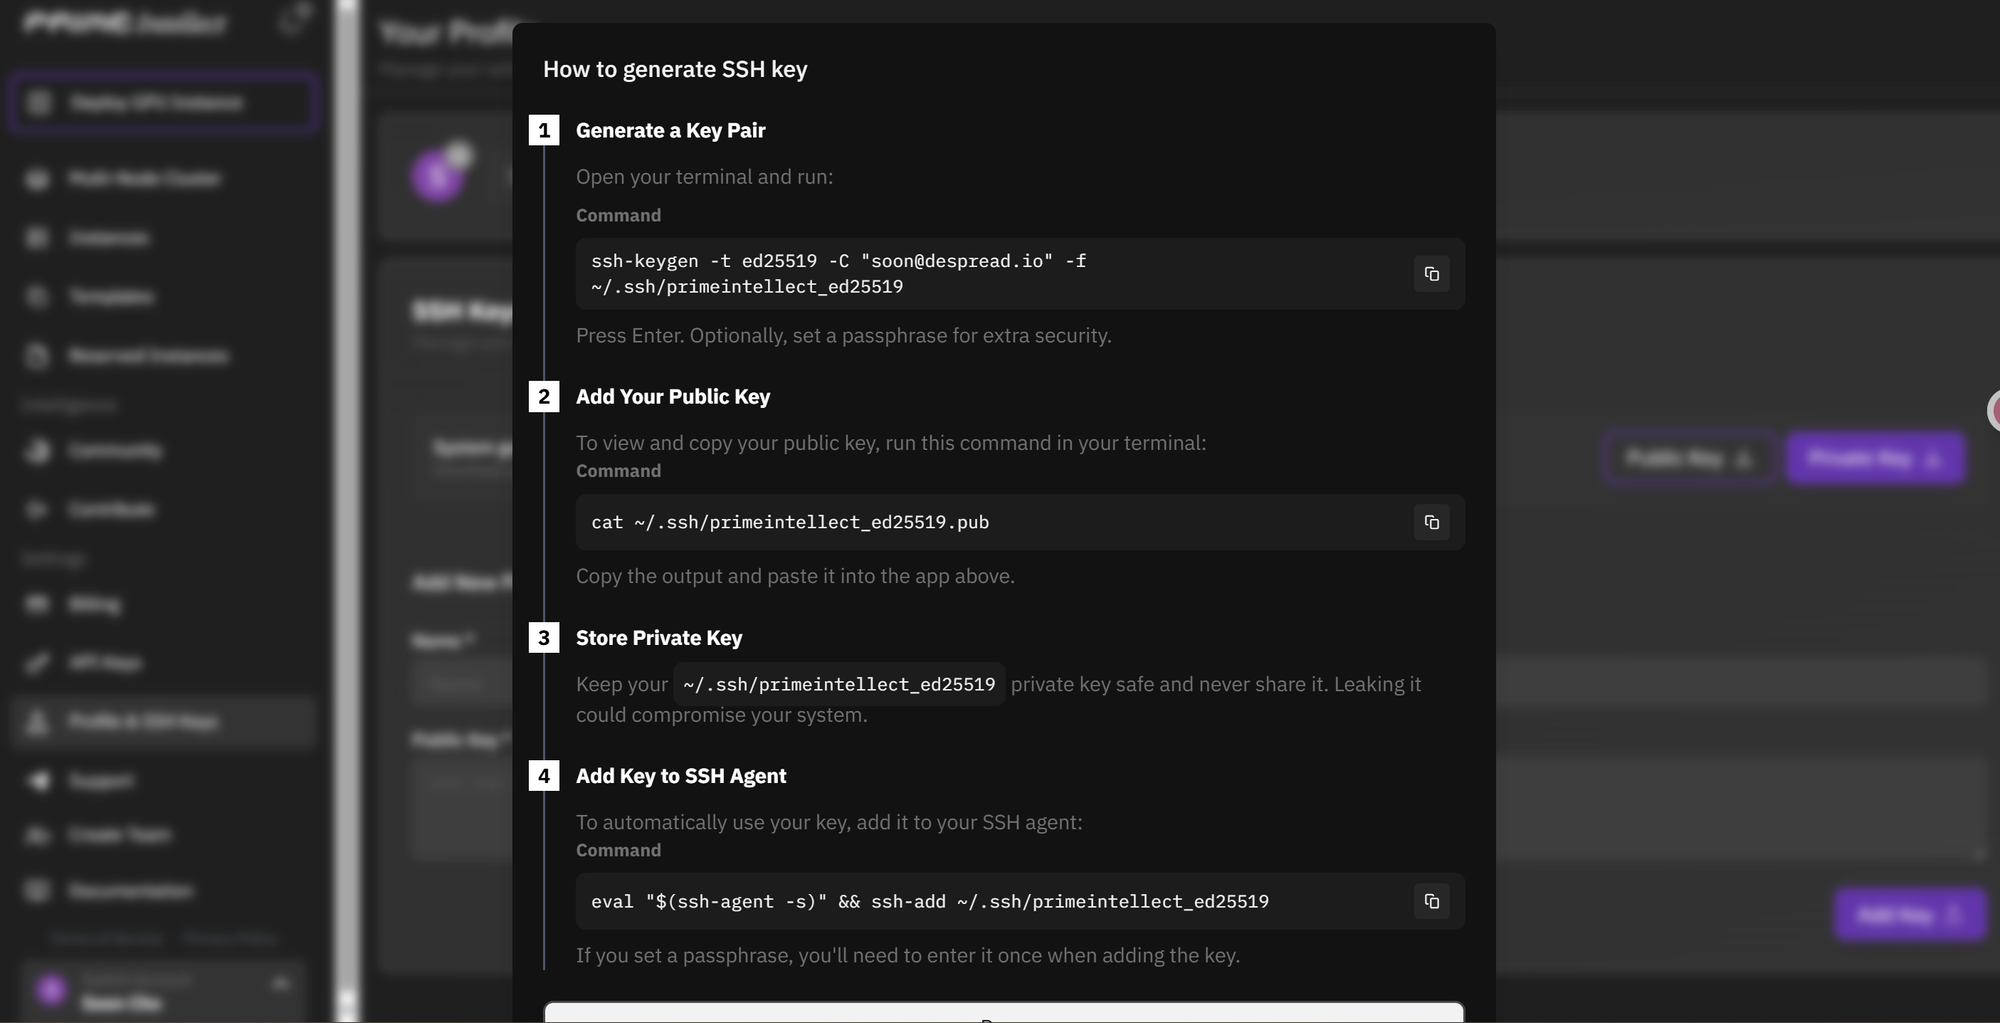
Here's the English translation for the key generation steps:
- Generate a Key Pair: Command to create a public/private key pair (like a username and password).
- Add Your Public Key: Command to register your public key (username).
- Store Private Key: Your private key (password) is stored in your local environment.
- *Never expose your private key to external parties.
- Add Key to SSH Agent: Command to register the key with an agent that automates SSH login authentication.
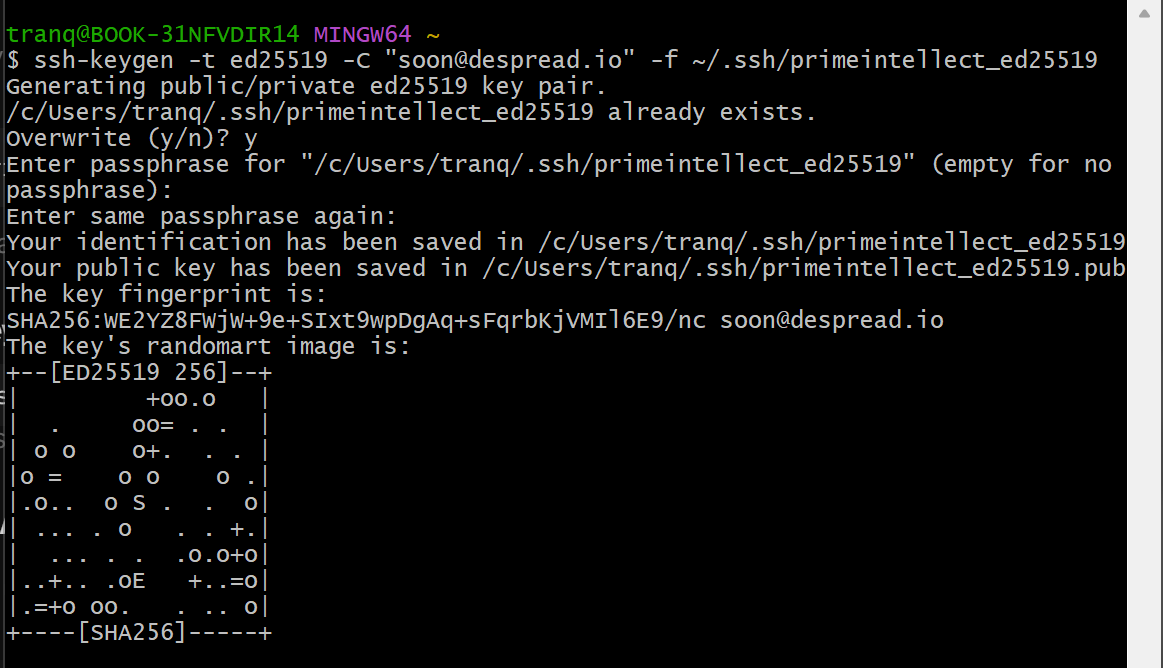
2.3. Enter each command sequentially into Git Bash and press Enter to execute them. (If you don't have Git Bash, install it.)
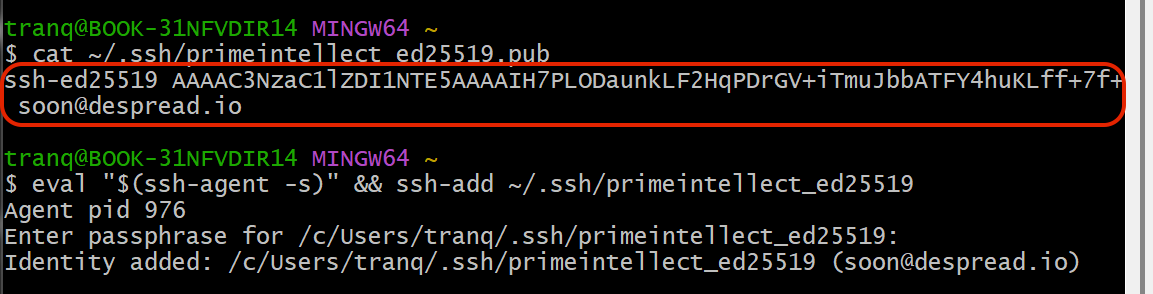
2.4. The image below shows the Git Bash status after successfully executing the commands.
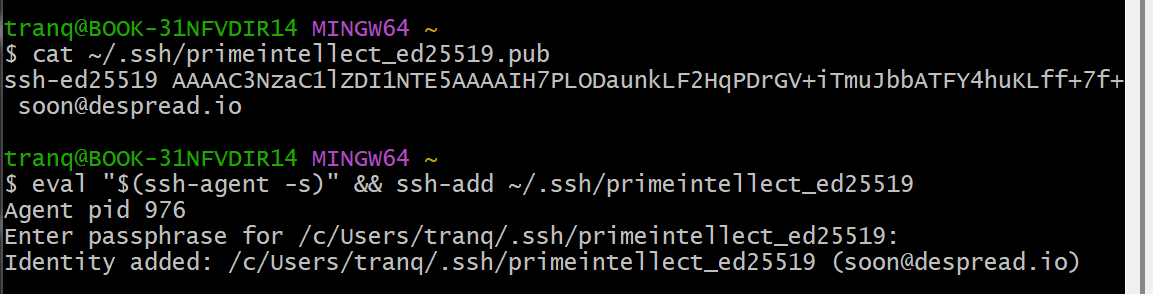
2.5. Copy the public key located in the section shown in the image below, from the values displayed in Git Bash.
3. Select GPU and Rent Server
3.1. Return to Prime Intellect and click the "Deploy GPU Instance" tab in the top left corner.
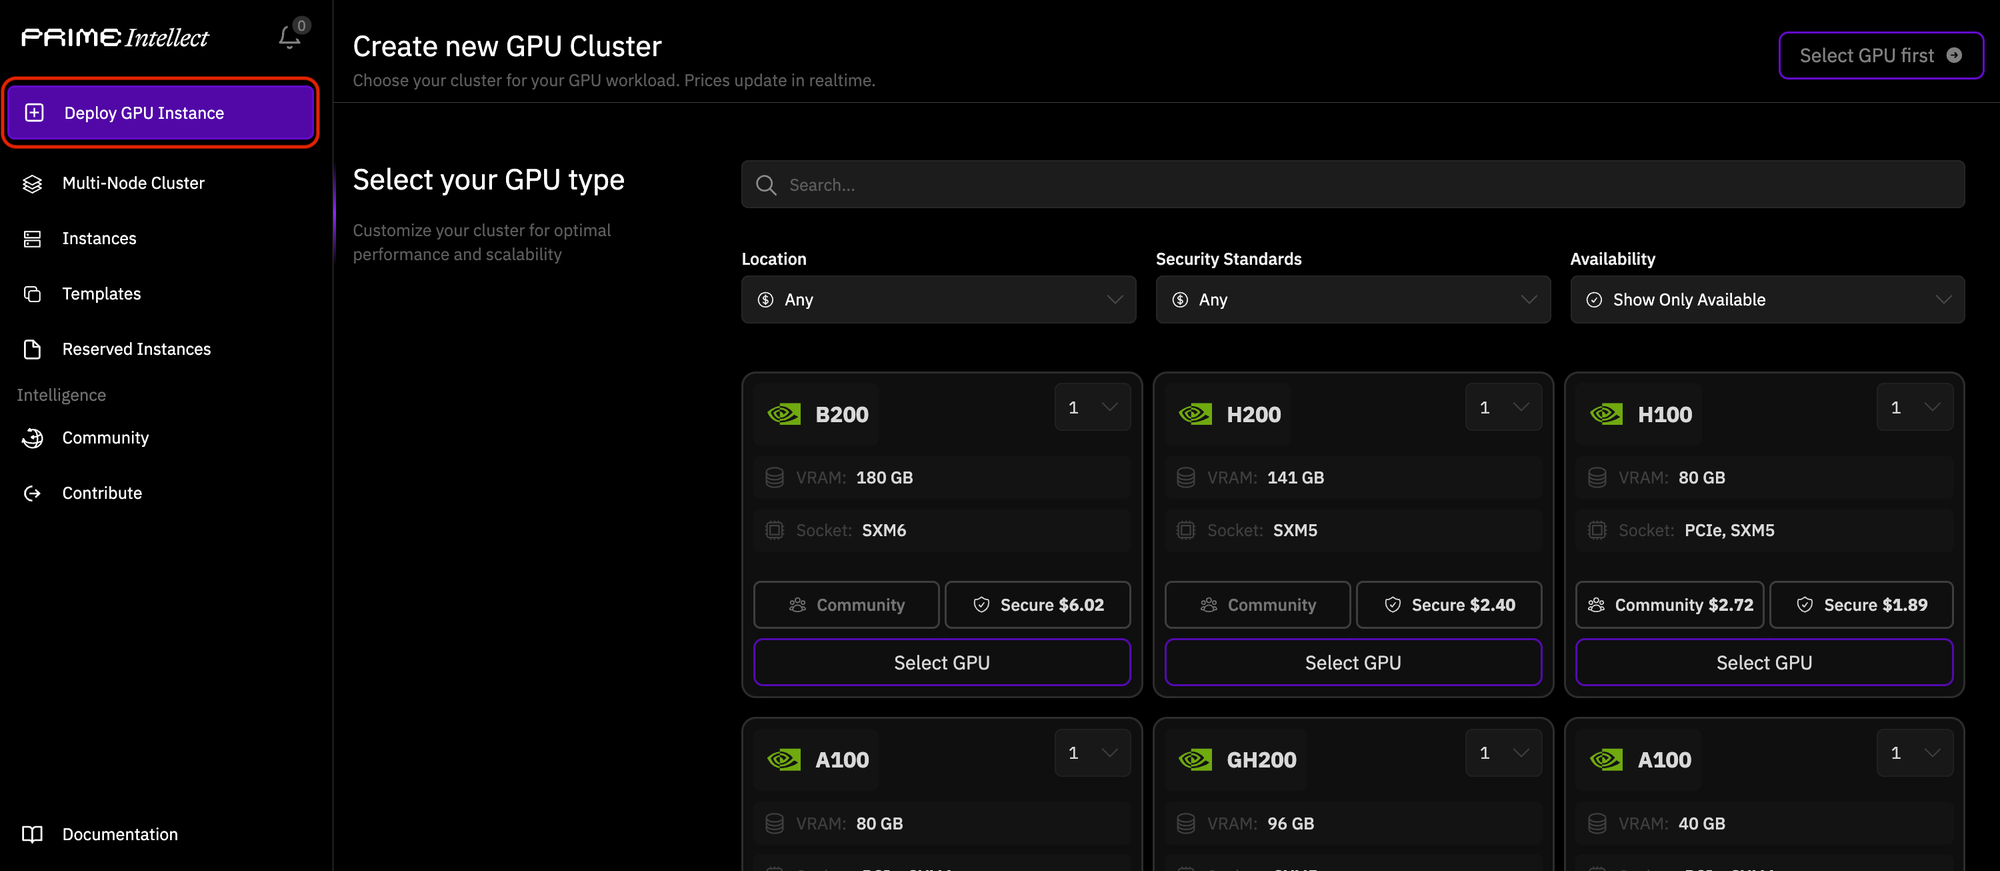
3.2. Select the desired GPU type and security environment for your rental by clicking on them.
- Community: This environment is more affordable and convenient but offers a relatively lower level of security and isolation (shared). It's suitable for personal learning or lighter tasks.
- Secure: This option is more expensive but provides enhanced security and isolation (closer to dedicated). It's suitable for sensitive data or critical commercial tasks.
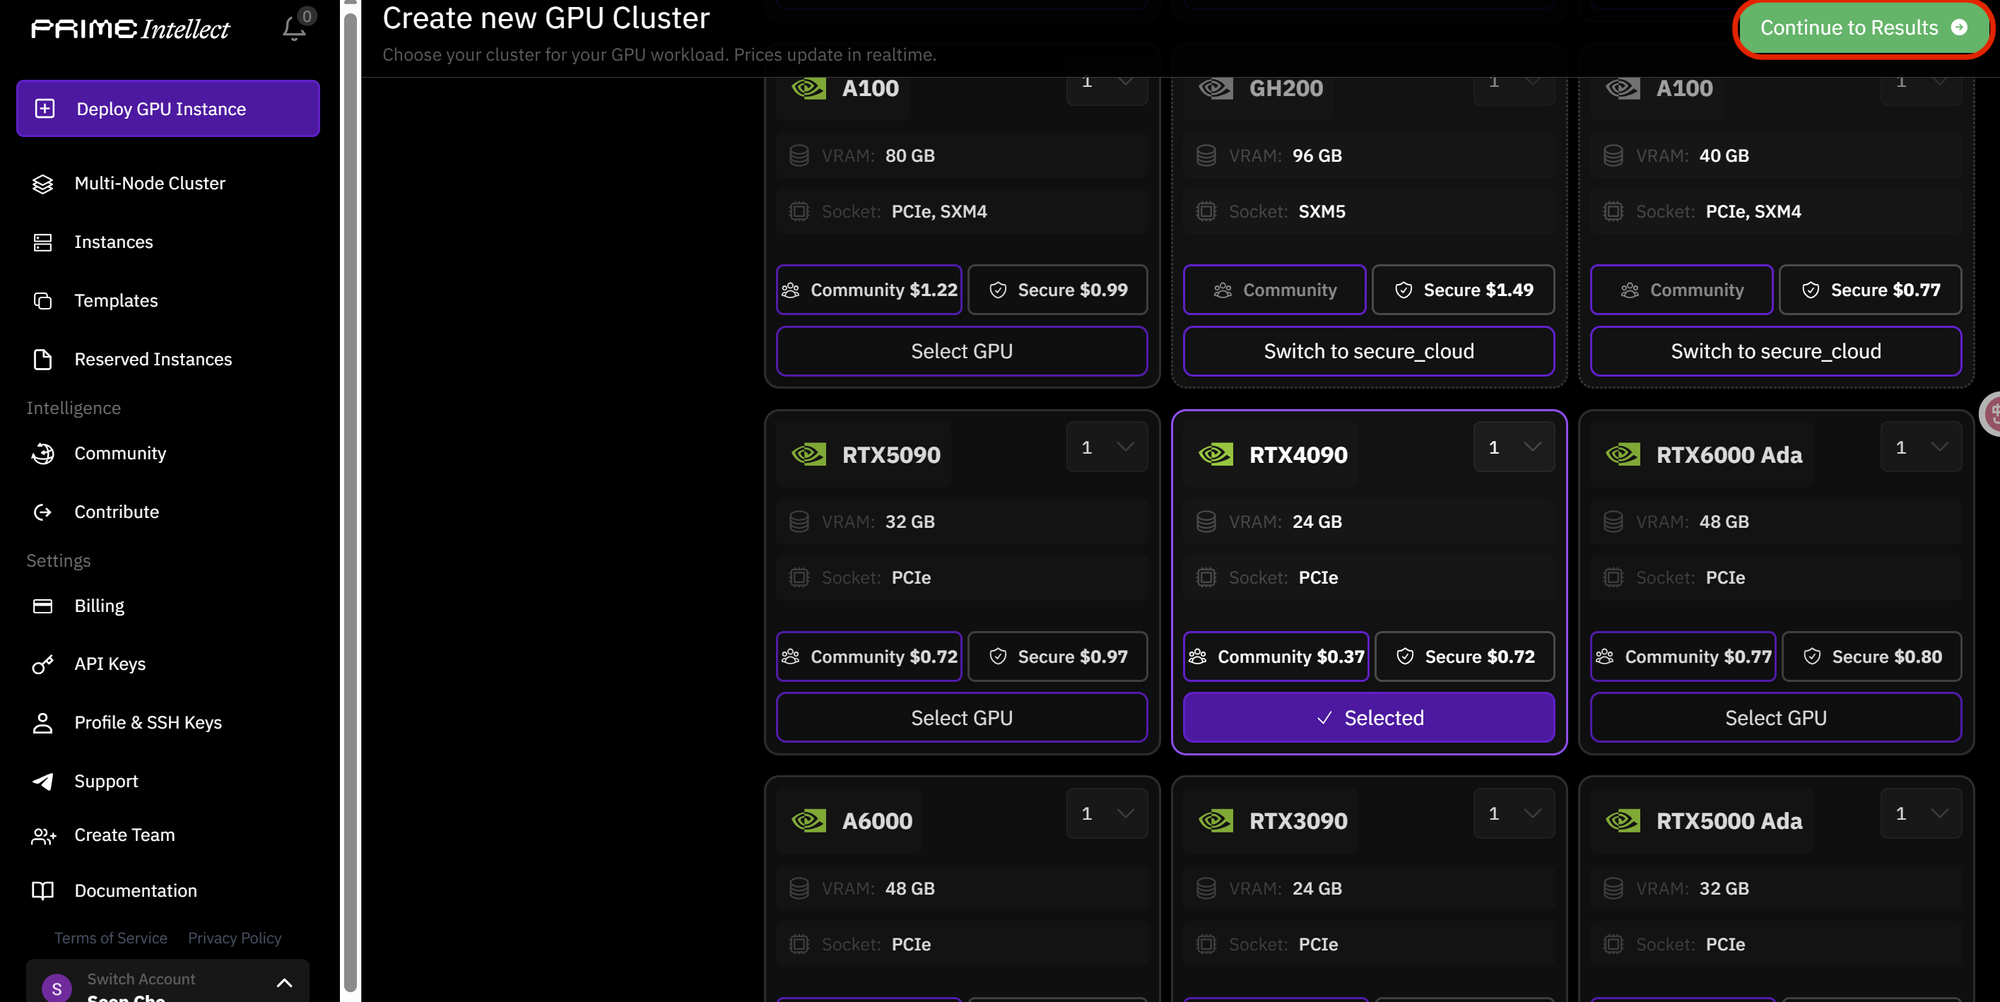
For this guide, we'll proceed with an example of renting an RTX4090 with the Community security environment.
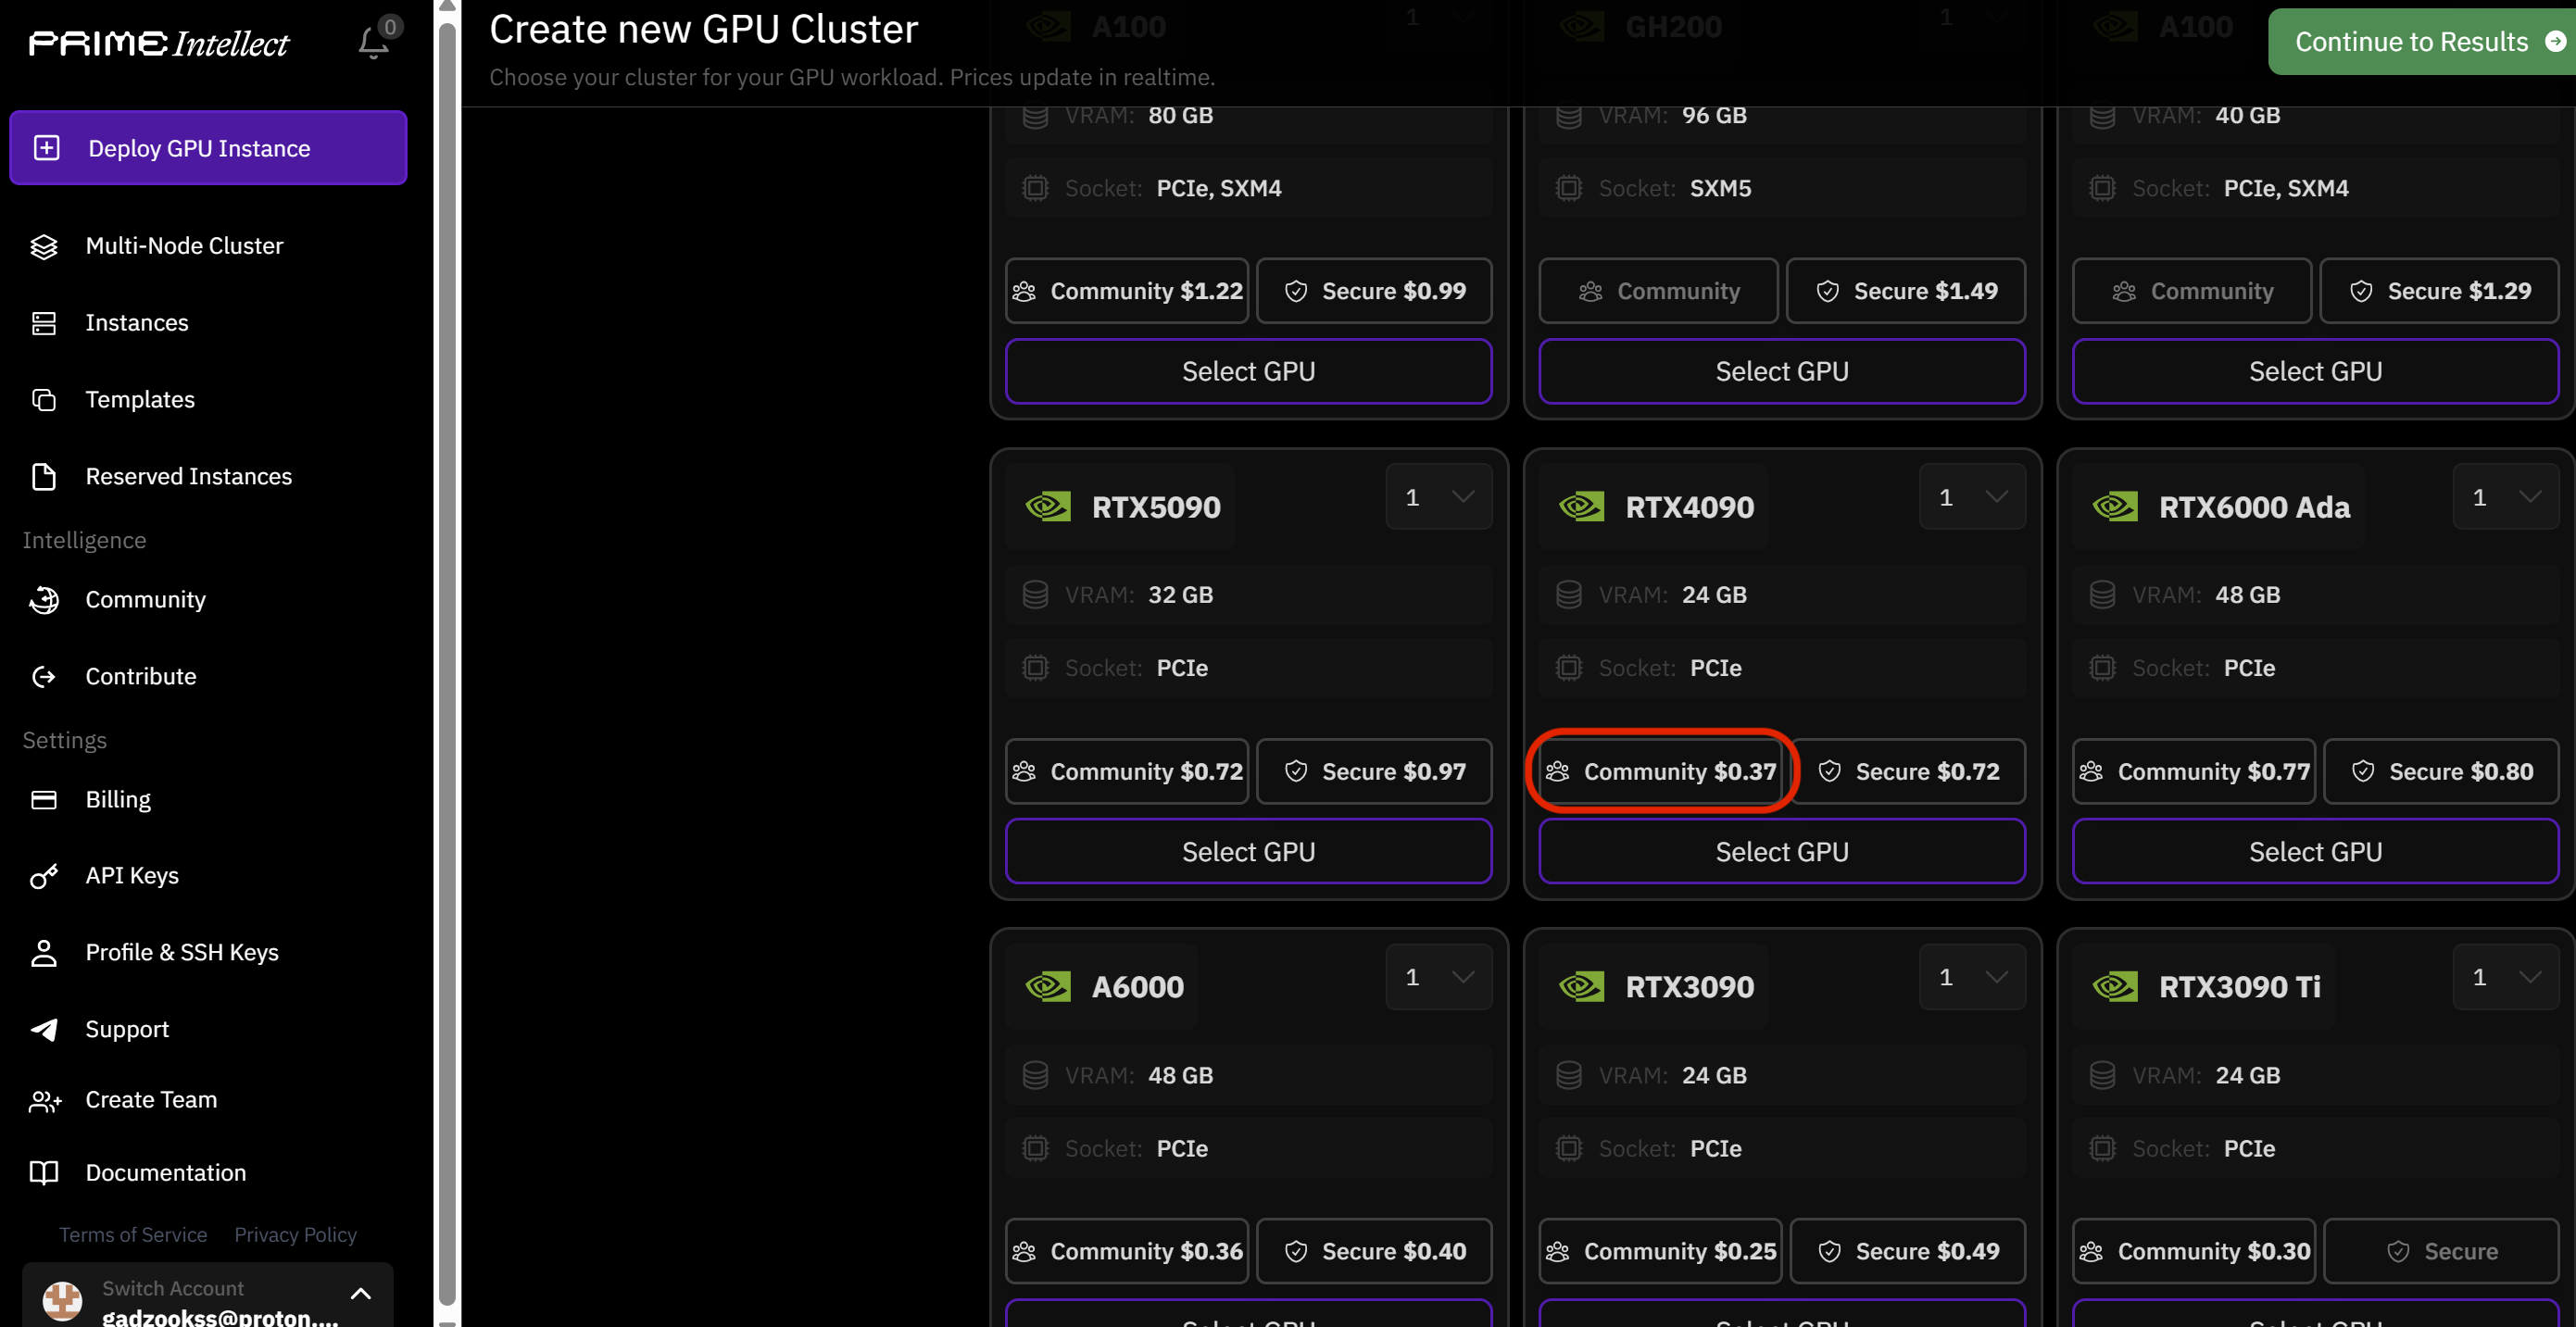
3.3. Click the "Continue to results" button in the top right corner.
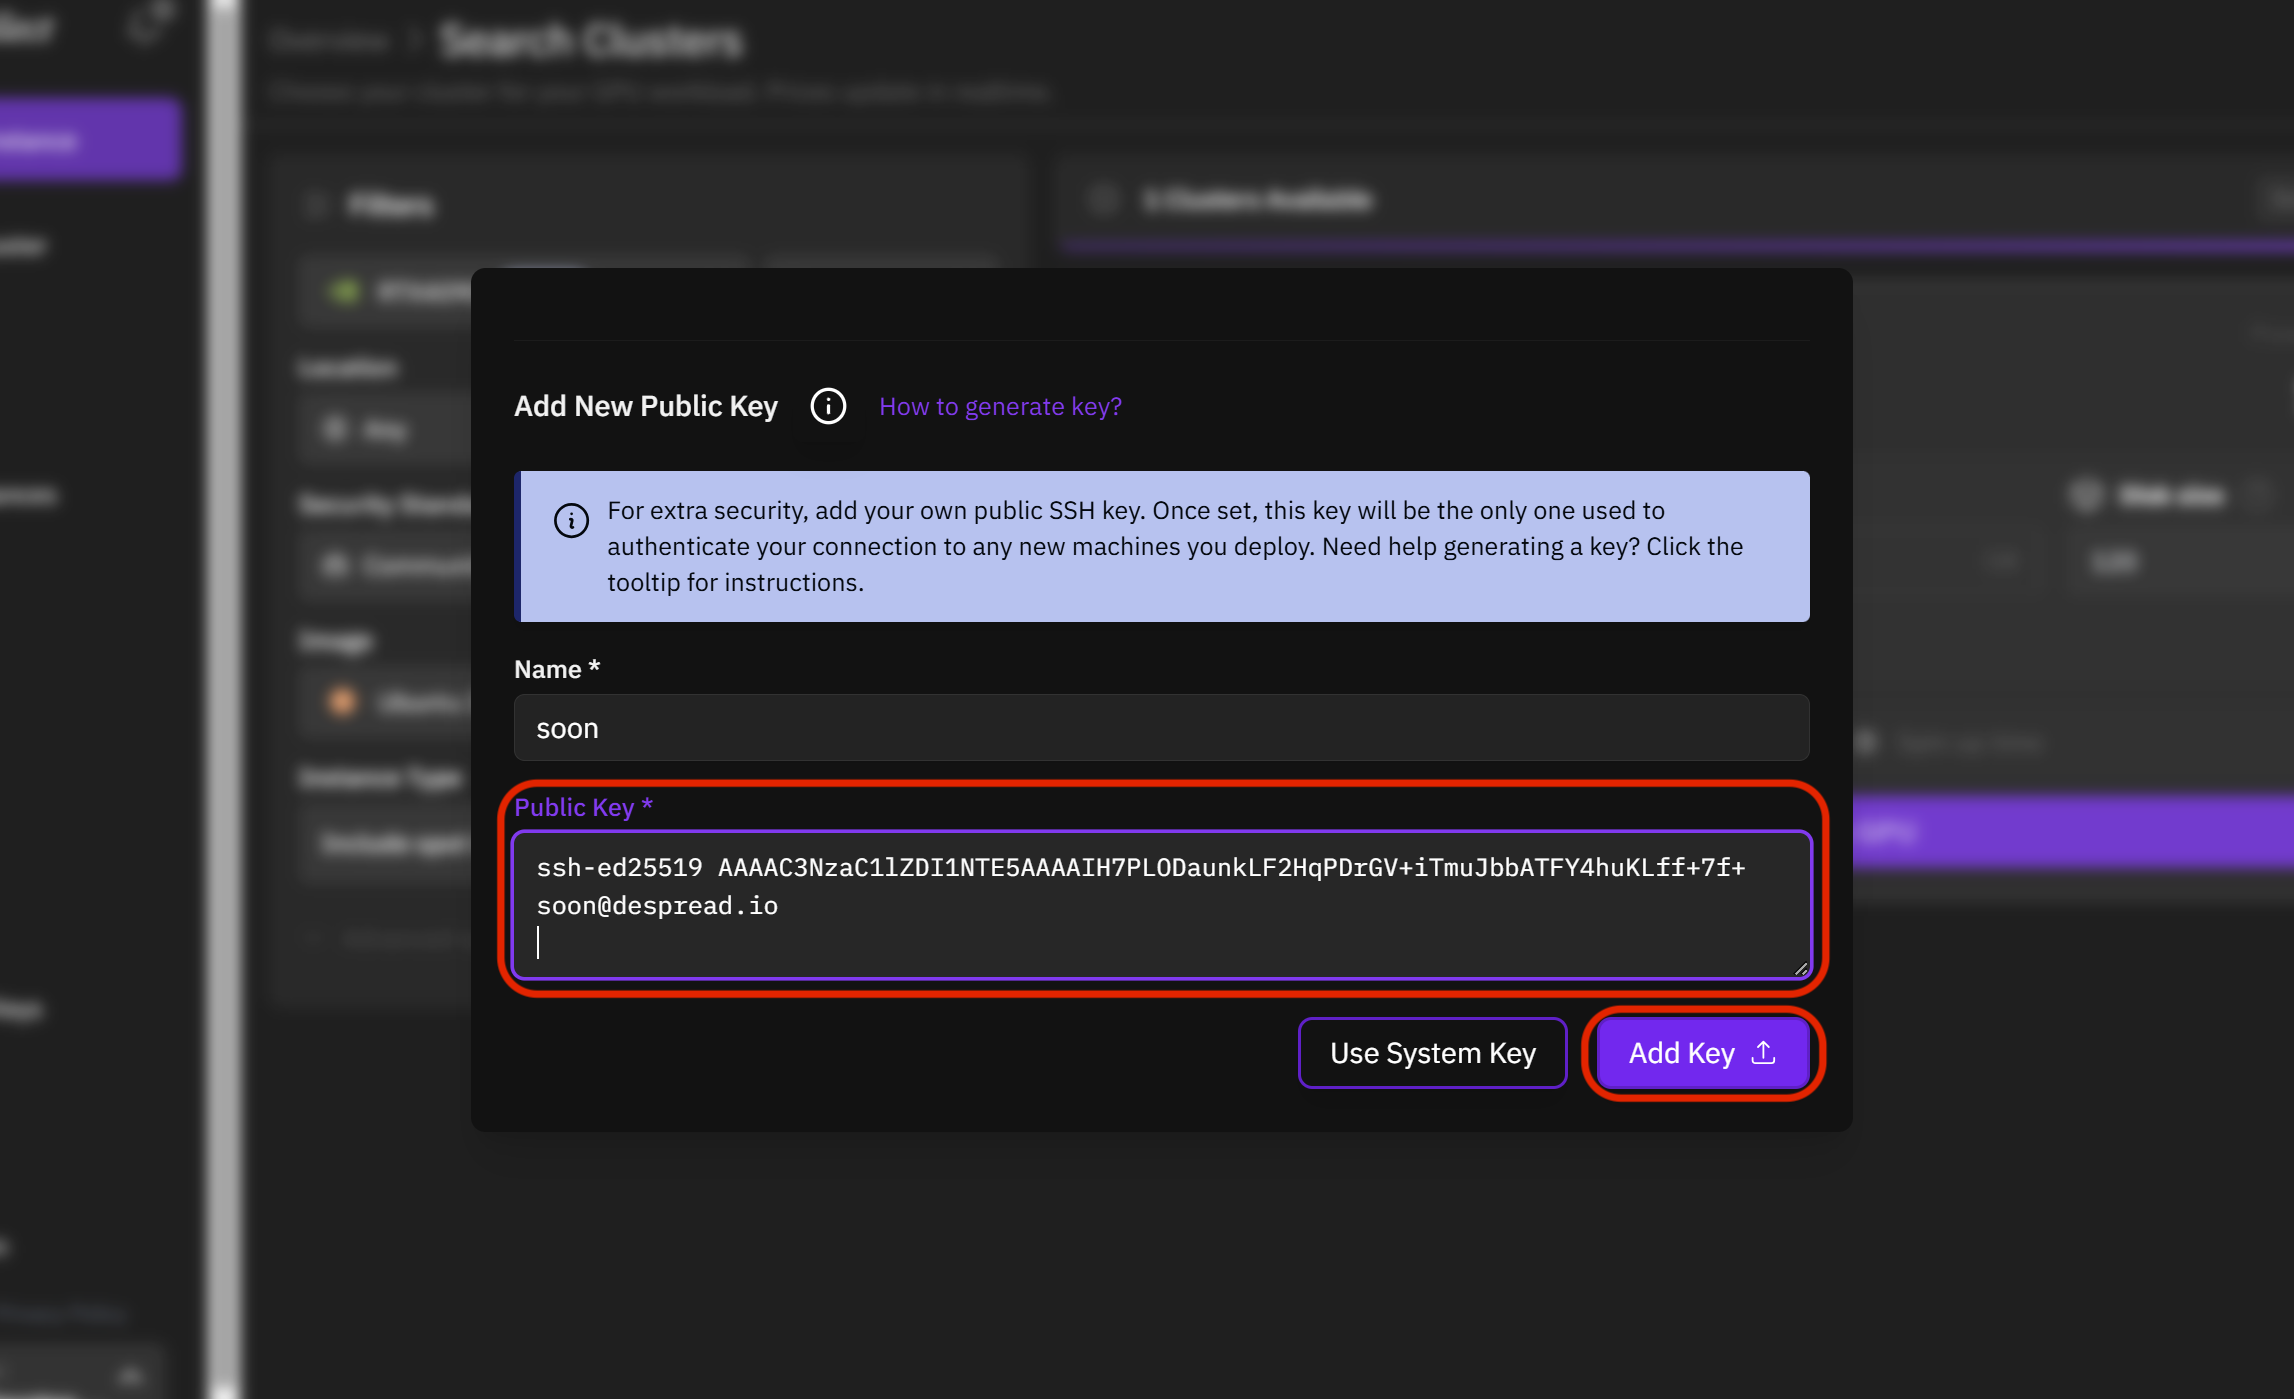
3.4. Paste the public key you copied earlier into the Public Key input field, then click the "Add Key" button
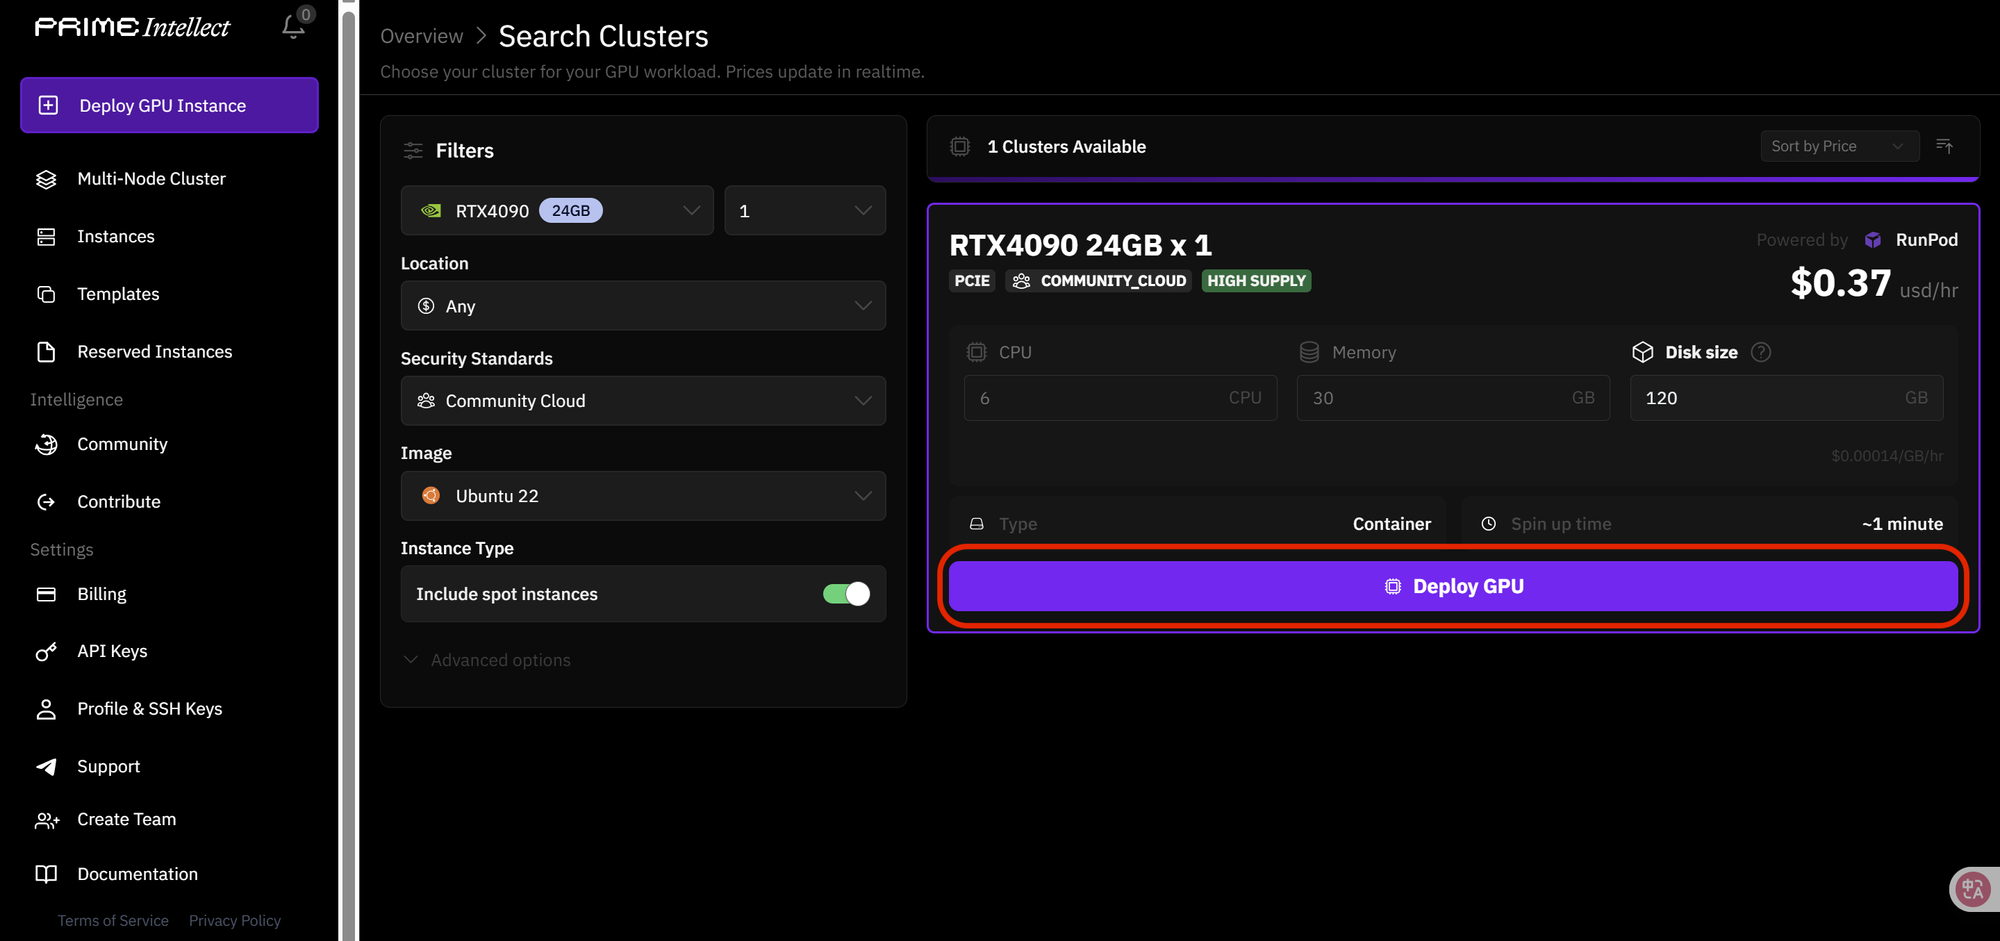
3.5. Once the public key has been added, click the "Deploy GPU" button.
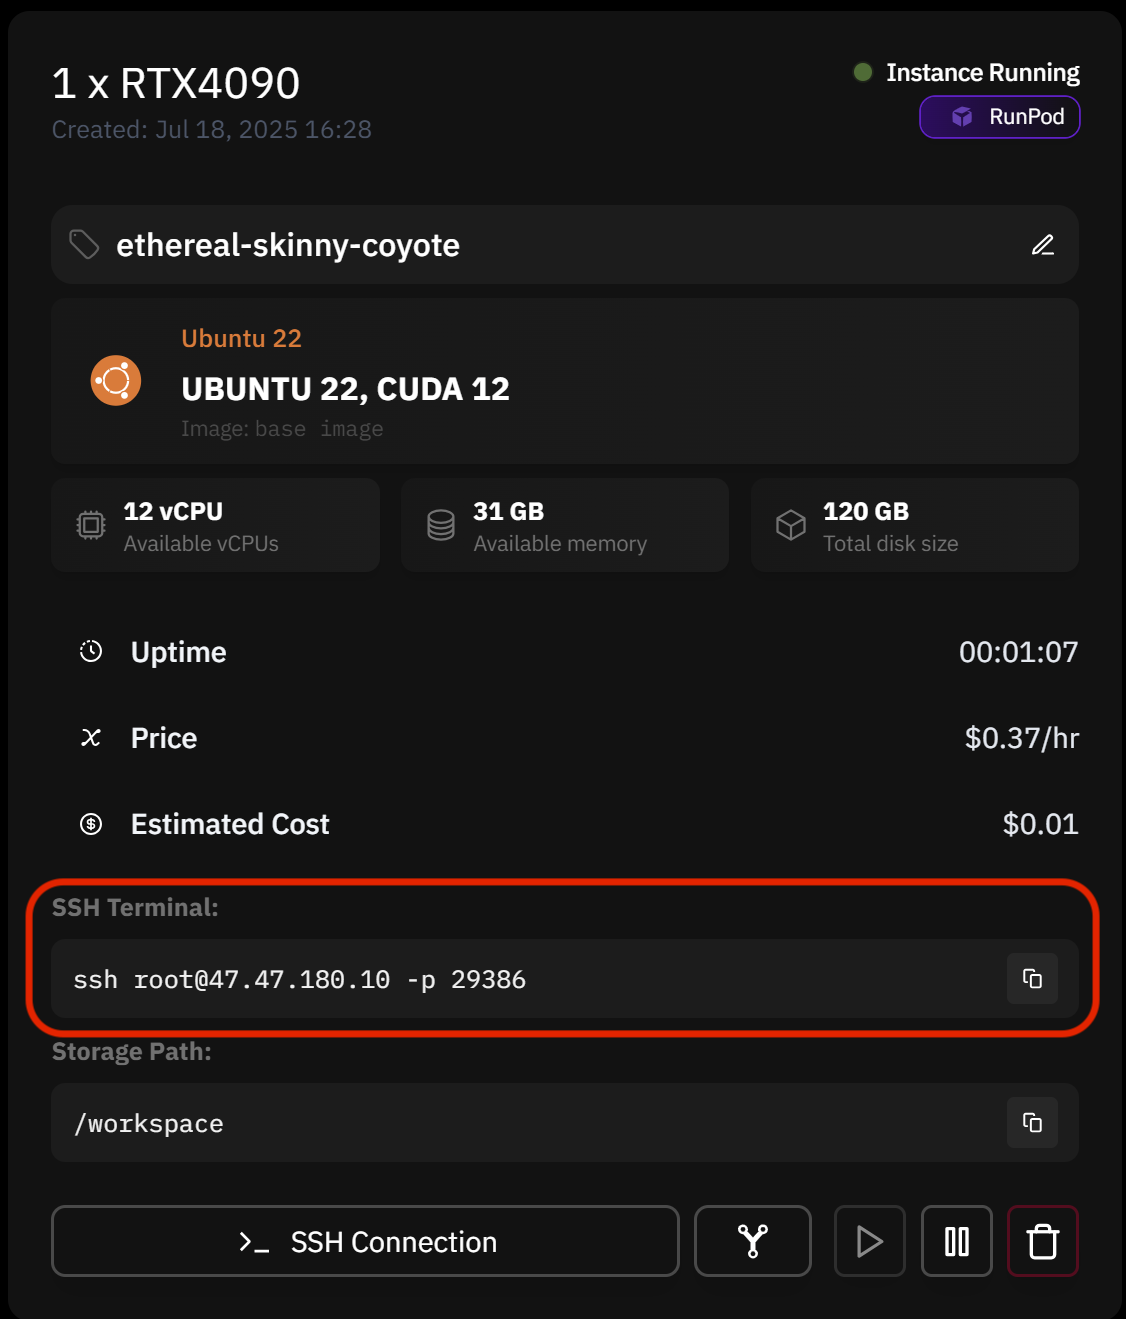
3.6. After about 1 to 2 minutes, the SSH Terminal (server connection command) will appear. Copy this command.
4. Access the Rented Server
4.1. Paste the copied SSH Terminal command into Git Bash and press Enter.
4.2. If the message 'Are you sure you want to continue connecting ~' appears after entering the command, type 'yes' and press Enter.
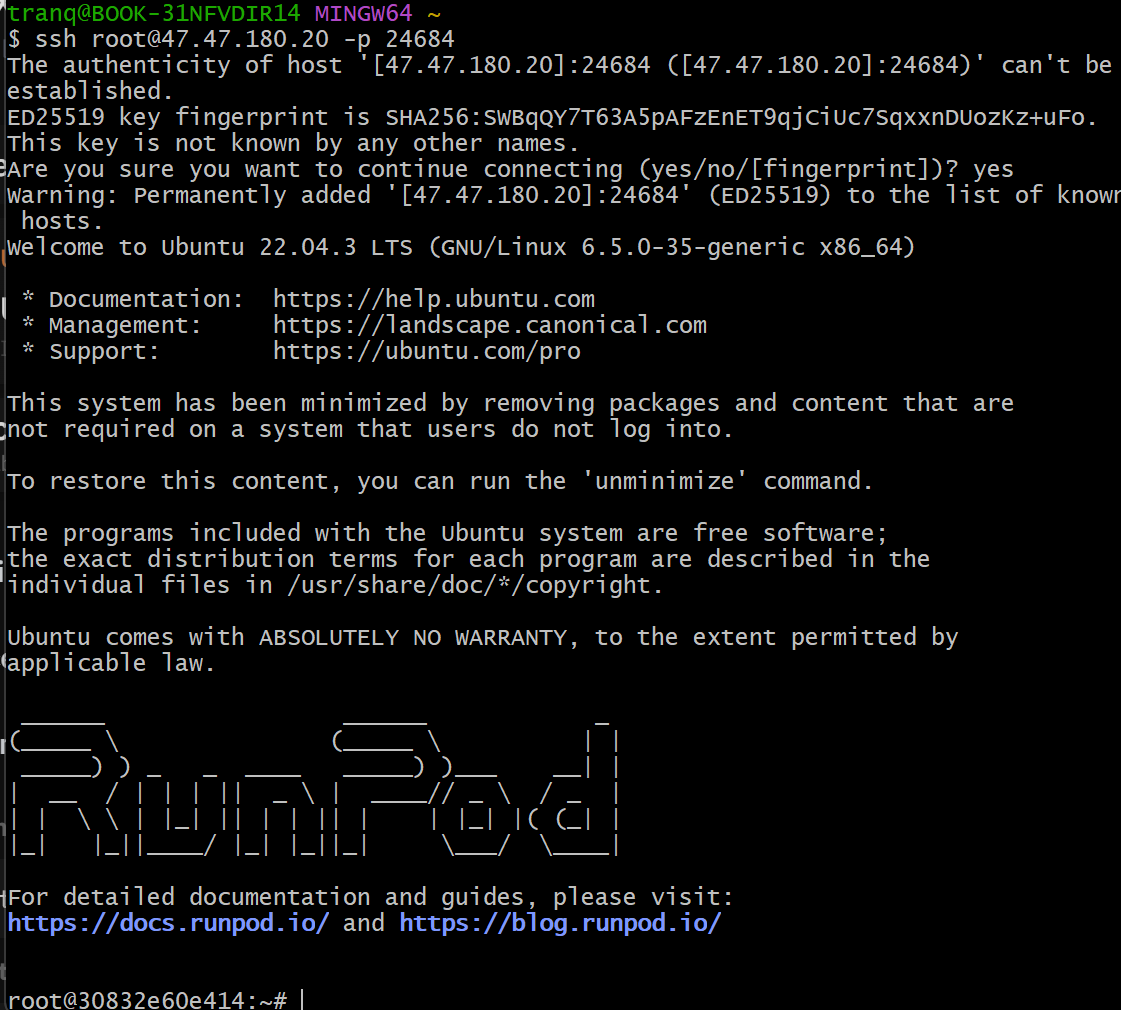
Upon completing the steps above, you'll see the remote server's terminal prompt, indicating that you've successfully connected to the server.
You can now freely perform various computing tasks on your rented server, such as running nodes or executing scripts.
- Prime Intellect Official Website: https://www.primeintellect.ai/
- Prime Intellect Docs: https://docs.primeintellect.ai/introduction
- Prime Intellect Twitter: https://x.com/PrimeIntellect
- Prime Intellect Discord: https://discord.com/invite/primeintellect